
If you love crisp, punchy fridge pickles that wake up sandwiches, salads, snack boards, and weeknight dinners, you are going to be very happy with this recipe. I make these quick tangy pickled veggies whenever I have extra cauliflower, carrots, celery, or peppers in the fridge, and honestly, they disappear faster than anything store-bought ever does.
What I love most is how easy they are. There is no canning setup, no complicated technique, and no long wait before you can enjoy them. You just prep the vegetables, make a simple vinegar brine, pour it over the jars, and let the refrigerator do the rest. The result is colorful, crunchy, lightly seasoned pickled vegetables with that perfect balance of bright tang and fresh vegetable snap.
These homemade pickles feel a little special, but they are completely practical too. They help cut food waste, they make everyday meals more interesting, and they are easy to adapt based on what you have on hand. I am sharing the version I come back to again and again because it is reliable, flexible, and exactly the kind of recipe that makes you feel like your fridge is working a little harder for you.
Quick Recipe Info
| Prep time | 20 minutes |
| Cook time | 5 minutes |
| Total time | 25 minutes |
| Servings | 8 servings |
| Difficulty | Easy |
Why You’ll Love It
- It delivers crisp texture and bold tang without any special canning equipment.
- The colorful mix of cauliflower, carrots, celery, and peppers looks beautiful in jars and on the table.
- You can use these pickled veggies in sandwiches, wraps, grain bowls, salads, burgers, and snack plates.
- It is a smart way to use up extra vegetables before they go limp in the crisper drawer.
- The recipe is easy to customize with more heat, more garlic, or different herbs and spices.
- These fridge pickles taste fresh and lively, not dull or overly soft.
Nutritional Benefits and Adaptable Variations
Why these pickled veggies are a nice addition
Because this recipe is built around vegetables, each serving gives you a light, flavorful way to add more produce to your day. Cauliflower, carrots, celery, and peppers each bring their own mix of fiber, crunch, and naturally occurring vitamins. The brine adds lots of flavor with very few calories, which is one reason I love keeping a jar in the fridge for quick meals and savory snacks. As always, if you are monitoring sodium, you can adjust your portion and compare it with your own dietary needs.
Easy ways to change it up
This recipe is very forgiving. You can swap in sliced cucumbers, radishes, green beans, or onions if you want to use what you already have. For a warmer spice profile, add coriander seed or a pinch of red pepper flakes. If you want a slightly sweeter brine, increase the sugar just a bit. If you love heat, use extra jalapeño or serrano slices. The key is to keep the vegetables fresh and crisp and make sure they stay fully submerged in the brine while chilling.
Ingredients
[INSERT INGREDIENT IMAGE HERE]
For the vegetables
- 3 cups cauliflower florets
- 2 medium carrots, peeled and sliced into coins
- 2 celery stalks, sliced into bite-size pieces
- 1 red bell pepper, sliced
- 1 jalapeño, thinly sliced
- 2 garlic cloves, smashed
For the brine
- 1 1/2 cups white vinegar
- 1 1/2 cups water
- 2 tablespoons kosher salt
- 1 tablespoon sugar
- 1 teaspoon black peppercorns
- 1 teaspoon mustard seeds
- 1/2 teaspoon dried dill or 2 small fresh dill sprigs
Step-by-Step Instructions
- Wash and dry the vegetables well. Cut the cauliflower into small florets, slice the carrots and celery, slice the bell pepper into strips, and thinly slice the jalapeño.
- Divide the vegetables between 2 clean pint jars. Tuck in the smashed garlic cloves so they are distributed between the jars.
- In a small saucepan, combine the white vinegar, water, kosher salt, sugar, peppercorns, mustard seeds, and dill. Bring the mixture to a gentle simmer over medium heat, stirring just until the salt and sugar dissolve.
- Carefully pour the hot brine over the vegetables, making sure they are fully submerged. Leave about 1/2 inch of space at the top of each jar.
- Let the jars cool at room temperature for about 30 minutes. If needed, gently press the vegetables down with a clean spoon so everything stays under the brine.
- Seal the jars with lids and refrigerate. For the best flavor, chill for at least 24 hours before eating, although they will start tasting pickled much sooner.
- Serve cold straight from the jar, with sandwiches, charcuterie, grilled foods, or anything that needs a bright crunchy bite.
Tips, Serving Suggestions & Substitutions
Best tip for crisp fridge pickles
Pack the jars snugly, but do not crush the vegetables. Keeping the pieces fairly large and using very fresh produce makes the biggest difference in staying crisp and crunchy after chilling.
Serving suggestions
I love these alongside grilled chicken, tucked into wraps, spooned over grain bowls, or served with sharp cheese and crackers. They are also fantastic chopped into tuna salad, egg salad, or potato salad for an instant punch of acidity and texture.
Simple substitutions
If you do not have cauliflower, try cucumbers or green beans. If jalapeño is too spicy, leave it out or use a few slices of mild green pepper instead. Apple cider vinegar can be used for a slightly softer, fruitier tang, though the color of the brine may look a bit warmer.
Nutrition Information
| Calories | 28 | Carbohydrates | 5 g |
| Protein | 1 g | Fat | 0 g |
| Fiber | 1 g | Sugar | 3 g |
| Sodium | 580 mg | Cholesterol | 0 mg |
Nutrition values are approximate estimates per serving and can vary with exact vegetable sizes and brine usage.
Storage & Make-Ahead Tips
Storage: Keep the jars covered in the refrigerator and make sure the vegetables stay submerged in brine as much as possible. For best quality and texture, enjoy them within 2 weeks.
Make-ahead: These are even better after a full day in the fridge, so they are perfect for prepping ahead of parties, lunches, and sandwich nights.
Food safety: This recipe is intended for refrigerator storage only, not shelf-stable canning. Use clean jars, refrigerate promptly after cooling, and discard if anything smells off or looks unusual.
FAQ
How long do fridge pickles take to taste good?
They start taking on flavor within a few hours, but I think they are best after at least 24 hours in the refrigerator. After that, the tang is more balanced and the vegetables taste more fully seasoned.
Can I reuse the brine?
I do not recommend reusing the same brine more than once, and only if it has been kept properly chilled and handled cleanly. For the best flavor and safest results, a fresh batch of brine is the better choice.
Why are my pickled vegetables not staying crisp?
Usually it comes down to the freshness of the vegetables, slicing them too thin, or leaving them too long in warm brine before chilling. Start with very fresh produce and keep the pieces fairly chunky for the best crunch.
Can I make these without sugar?
Yes, you can leave it out if you prefer. The small amount of sugar mainly softens the sharpness of the vinegar and rounds out the flavor, but the recipe still works without it.
What should I serve with quick pickled vegetables?
They are great with burgers, sausages, sandwiches, tacos, grain bowls, roasted meats, and cheese boards. I also snack on them straight from the jar when I want something crunchy and savory.
Final Thoughts
I really think once you make these quick tangy pickled veggies, you will see why homemade fridge pickles are so worth it. They are simple, vibrant, flexible, and genuinely better than store-bought. If you try them, I would love to hear how you served them or what vegetable mix you used. Feel free to leave a comment, share the recipe with a friend, and save it to Pinterest for the next time your fridge needs a little brightening up.
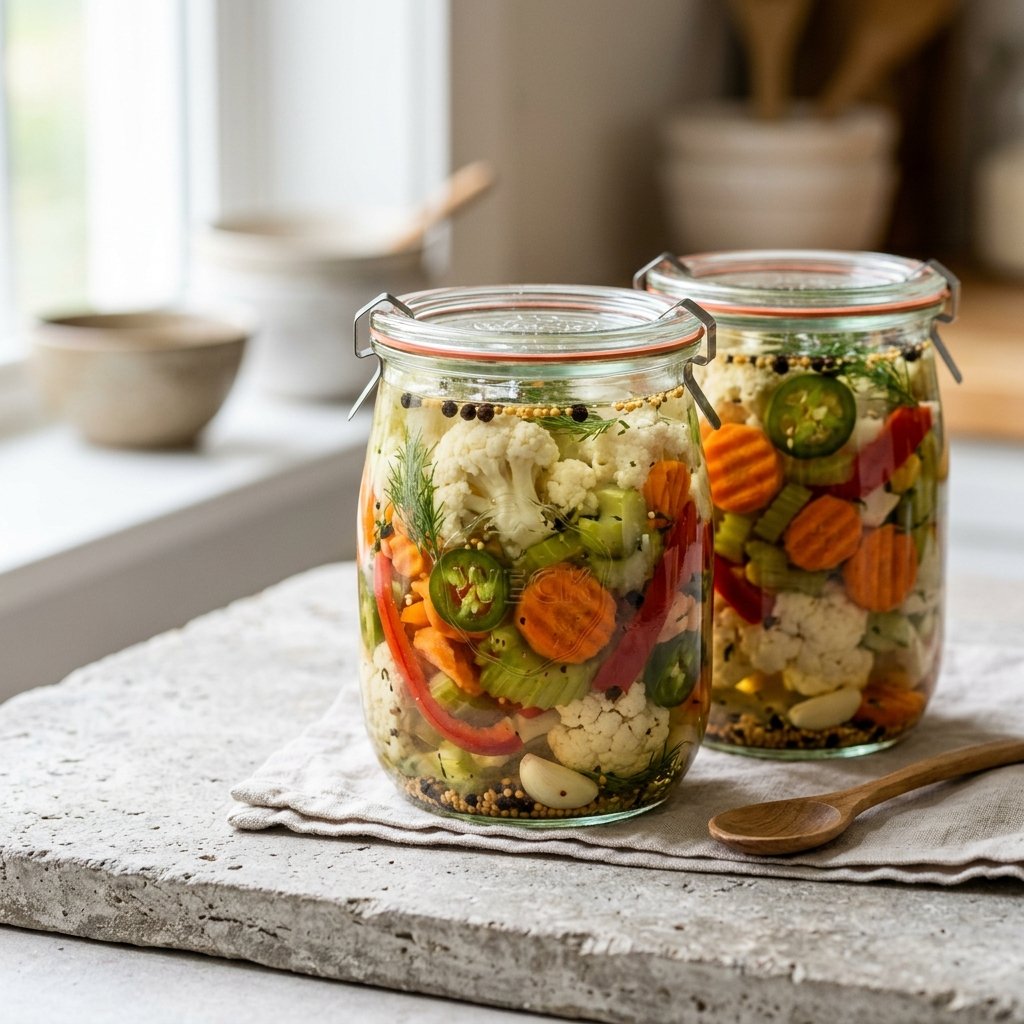
Quick Tangy Pickled Veggies: Better Than Store-Bought
Ingredients
Equipment
Method
- Wash and dry the vegetables well. Cut the cauliflower into small florets, slice the carrots and celery, slice the bell pepper into strips, and thinly slice the jalapeño.
- Divide the vegetables between 2 clean pint jars. Tuck in the smashed garlic cloves so they are distributed between the jars.
- In a small saucepan, combine the white vinegar, water, kosher salt, sugar, peppercorns, mustard seeds, and dill.
- Bring the mixture to a gentle simmer over medium heat, stirring just until the salt and sugar dissolve.
- Carefully pour the hot brine over the vegetables, making sure they are fully submerged. Leave about 1/2 inch of space at the top of each jar.
- Let the jars cool at room temperature for about 30 minutes. If needed, gently press the vegetables down with a clean spoon so everything stays under the brine.
- Seal the jars with lids and refrigerate. For the best flavor, chill for at least 24 hours before eating, although they will start tasting pickled much sooner.
- Serve cold straight from the jar, with sandwiches, charcuterie, grilled foods, or anything that needs a bright crunchy bite.