
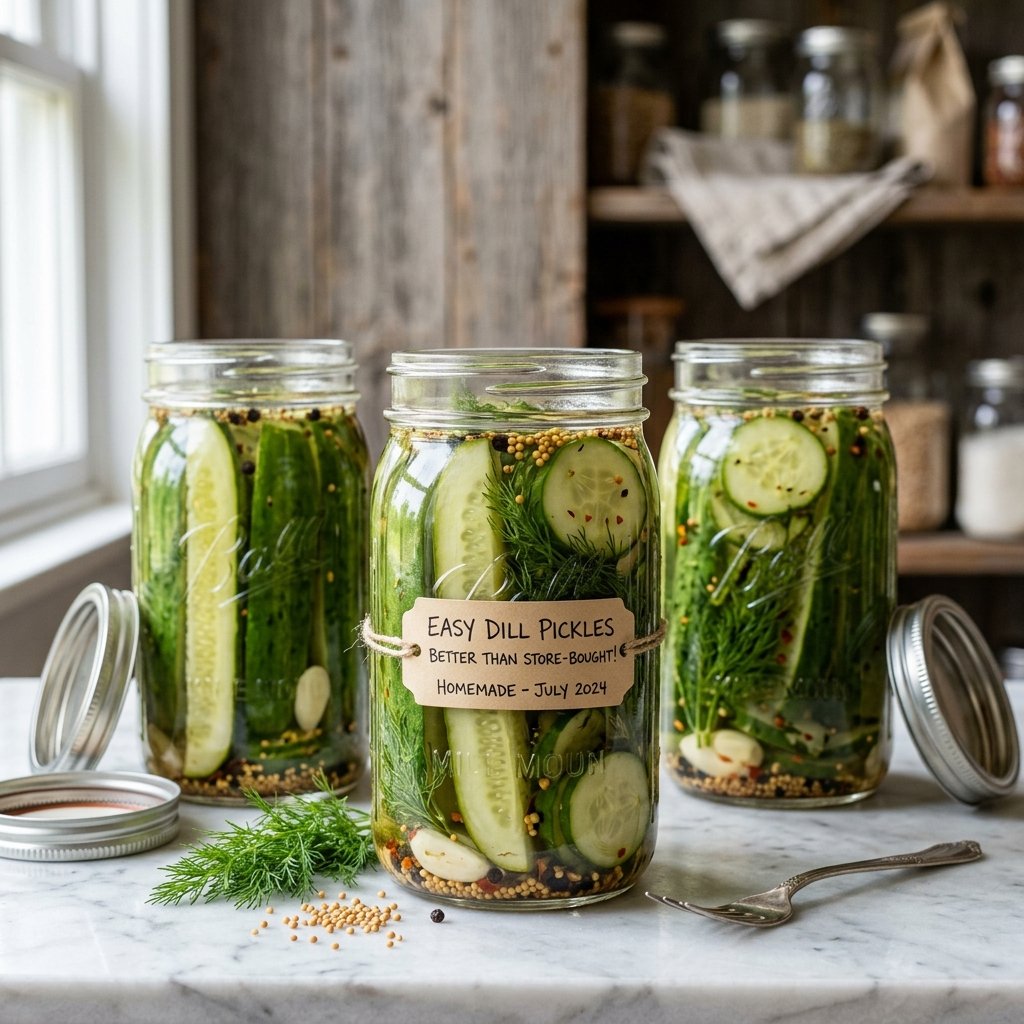
If you’ve ever wanted to make refrigerator pickles at home but thought it might be fussy or complicated, I’m so happy to tell you it’s the opposite. These easy dill pickles are incredibly simple, wonderfully crisp, and packed with that fresh, garlicky, tangy flavor that makes you reach back into the jar for just one more bite.
I love this recipe because it gives you that classic deli-style pickle taste without hauling out a canner or dealing with a long preserving process. You just make a quick brine, pour it over fresh cucumbers with dill and spices, and let the refrigerator do the rest. The result is bright, crunchy pickles that honestly taste better than many store-bought jars.
Whether you’re using cucumber spears for sandwiches, slices for burgers, or just snacking straight from the jar, this is one of those small kitchen projects that feels extra rewarding. I’ll walk you through everything so you can make a batch with confidence and tweak it to your taste once you see how easy it is.
Quick Recipe Info
| Prep time | 20 minutes |
| Cook time | 10 minutes |
| Total time | 30 minutes |
| Servings | 12 servings |
| Difficulty | Easy |
Why You’ll Love It
- No canning equipment or complicated preserving steps required.
- Fresh dill, garlic, and mustard seed give these pickles classic deli-style flavor.
- You can make spears, slices, or a mix depending on how you like to use them.
- They stay crisp and refreshing with a clean, bright brine.
- It’s easy to adjust the garlic, sweetness, or spice level to suit your taste.
- They’re perfect for burgers, sandwiches, snack boards, and everyday snacking.
Nutritional Benefits and Adaptable Variations
A light, flavorful homemade option
These pickles are a flavorful way to add crunch to meals without a lot of calories. Cucumbers are naturally hydrating, and making your own lets you control the balance of salt, sugar, and seasoning. Because this is a vinegar-based refrigerator pickle recipe, the flavor stays lively and fresh rather than heavy.
As always, nutrition can vary depending on the exact size of your cucumbers and how much brine clings to each serving, so think of the values below as helpful estimates rather than exact numbers.
Easy ways to make them your own
If you like a more old-fashioned dill pickle flavor, add a few peppercorns and a pinch of red pepper flakes. If you prefer a slightly rounder, less sharp brine, keep the small amount of sugar in the recipe. You can also use all spears, all slices, or thick cucumber coins depending on how you plan to serve them.
For a stronger garlic note, tuck an extra clove into each jar. For a lighter dill presence, reduce the amount just a bit. Once you make your first batch, you’ll start to see how flexible homemade refrigerator pickles can be.
Ingredients
[INSERT INGREDIENT IMAGE HERE]
For the pickles
- 2 pounds small pickling cucumbers, cut into spears or slices
- 6 cloves garlic, peeled and lightly smashed
- 1 large bunch fresh dill
- 3 teaspoons mustard seeds
- 1 teaspoon black peppercorns
- 1/4 teaspoon red pepper flakes, optional
For the brine
- 2 cups water
- 2 cups white vinegar
- 2 tablespoons kosher salt
- 1 tablespoon granulated sugar
Step-by-Step Instructions
- Wash the cucumbers well and trim the ends. Cut them into spears or slices, depending on how you want to use your pickles.
- Divide the garlic, fresh dill, mustard seeds, peppercorns, and red pepper flakes, if using, among 3 clean pint jars.
- Pack the cucumber spears or slices tightly into the jars. Leave a little space at the top so the brine can circulate around the cucumbers.
- In a small saucepan, combine the water, white vinegar, kosher salt, and sugar. Bring the mixture to a gentle simmer over medium heat, stirring just until the salt and sugar dissolve.
- Carefully pour the hot brine into the jars, covering the cucumbers completely. Let the jars cool at room temperature for about 30 minutes.
- Seal the jars with lids and transfer them to the refrigerator.
- For the best flavor, chill the pickles for at least 24 hours before eating. They continue to develop more flavor over the next 2 to 3 days.
Tips, Serving Suggestions & Substitutions
Best tip for crisp pickles
Use very fresh cucumbers and refrigerate the jars as soon as they’ve cooled. The fresher the cucumbers are when you start, the crisper your refrigerator pickles will stay.
Serving suggestions
I love serving these alongside grilled burgers, roast chicken sandwiches, tuna salad, or a simple lunch plate with cheese and crackers. They also add the perfect sharp, crunchy bite to potato salad and chopped salads.
Simple substitutions
You can swap white vinegar for part apple cider vinegar for a slightly softer tang, though the flavor will change a bit. If you don’t have mustard seeds, you can leave them out, but they do add that familiar pickle-shop flavor. Dill heads are wonderful here if you have them, but dill sprigs work beautifully too.
Nutrition Information
| Nutrient | Per serving |
| Calories | 22 |
| Carbohydrates | 5 g |
| Protein | 1 g |
| Fat | 0 g |
| Fiber | 1 g |
| Sugar | 3 g |
| Sodium | 390 mg |
Nutrition values are approximate per-serving estimates and can vary based on ingredient brands, cucumber size, and portion size.
Storage & Make-Ahead Tips
Storage: Keep the jars sealed in the refrigerator and make sure the cucumbers stay submerged in the brine as much as possible. For best quality and texture, enjoy them within 3 weeks.
Make-ahead: These are even better after they’ve had a full day to chill, so they’re an ideal make-ahead recipe for cookouts, lunches, and sandwich prep.
Food safety note: These are refrigerator pickles, not shelf-stable canned pickles, so they should be stored in the refrigerator at all times. If anything smells off or the texture changes significantly, it’s best to discard them.
FAQ
1. How long do refrigerator pickles take before they’re ready to eat?
You can nibble on them after 24 hours, but I think they taste best after 2 to 3 days in the refrigerator, when the cucumbers have had more time to absorb the brine.
2. Do I have to use pickling cucumbers?
Pickling cucumbers are best because they stay firmer and crisper, but small Persian cucumbers can also work well. I would avoid large waxy salad cucumbers if possible because they tend to be less crisp.
3. Can I reuse the brine for another batch?
I don’t recommend it for the best flavor and food safety. Once the brine has sat with the cucumbers, garlic, and dill, it becomes diluted and less reliable for a fresh batch.
4. Why are my homemade pickles not crunchy enough?
Usually it comes down to cucumber freshness. Start with very fresh, firm cucumbers, trim them right before brining, and chill the jars promptly after cooling for the best crisp texture.
5. Can I make these more or less tangy?
Yes, but make changes carefully. You can soften the tang slightly by increasing the sugar just a touch or replacing part of the white vinegar with apple cider vinegar. I wouldn’t reduce the vinegar too much, since it’s important to both flavor and proper pickling balance.
Final Thoughts
If you’ve been curious about making homemade pickles, this is such a good place to start. These easy refrigerator pickles are simple, dependable, and full of fresh dill flavor that makes everyday meals feel a little more special. If you try them, I’d love to hear how you served them or how you made them your own. Feel free to leave a comment, share the recipe with a fellow pickle lover, and save it to Pinterest for your next batch.
Easy Dill Pickles: Better Than Store-Bought!
Ingredients
Equipment
Method
- Wash the cucumbers well and trim the ends. Cut them into spears or slices.
- Divide the garlic, fresh dill, mustard seeds, peppercorns, and red pepper flakes, if using, among 3 clean pint jars.
- Pack the cucumber spears or slices tightly into the jars, leaving a little space at the top.
- In a small saucepan, combine the water, white vinegar, kosher salt, and sugar. Bring to a gentle simmer over medium heat, stirring until the salt and sugar dissolve.
- Carefully pour the hot brine into the jars, covering the cucumbers completely.
- Let the jars cool at room temperature for about 30 minutes, then seal with lids and transfer to the refrigerator.
- Chill for at least 24 hours before eating. For the best flavor, wait 2 to 3 days.