
Hey Sushi Lovers, Let’s Make a Tasty Salmon Sushi Bake!
If you’re anything like me, sometimes you crave sushi but don’t want to fuss with rolling every piece by hand. That’s where this salmon sushi bake comes in—it’s super flavorful, fun to make, and a little easier than traditional sushi rolls. Plus, it’s a crowd-pleaser, perfect for family dinners or casual get-togethers. I love how the creamy spicy mayo and flaky salmon come together on top of that perfectly seasoned sushi rice. Ready to dive in? Let’s go!
Nutritional Benefits of This Dish
Besides tasting amazing, this salmon sushi bake brings some solid nutritional perks to the table. Salmon is packed with omega-3 fatty acids, which are fantastic for heart health and brain function. The sushi rice provides energy through carbs, while the fish roe adds a little boost of protein and some essential minerals. Plus, using Japanese mayo and sriracha gives you bold flavor without needing extra heavy sauces. Overall, it’s a balanced dish that feels a bit indulgent but still leaves you satisfied and energized.
Adaptable Variations You’ll Love
- Go Vegetarian: Swap out the salmon for roasted or grilled shiitake mushrooms or even marinated tofu cubes. You’ll still get a rich, umami-packed topping without the fish.
- Make It Less Spicy: Adjust the sriracha amount or skip it altogether and mix the mayo with a little soy sauce and honey for a sweet-savory alternative.
- Gluten-Free Twist: Be sure to use gluten-free soy sauce or tamari to keep it safe for gluten-sensitive friends.
- Extra Crunch: Add thinly sliced cucumbers or avocado slices on top after baking for freshness and texture.
Step-by-Step Salmon Sushi Bake Recipe
Ingredients
- 2 cups sushi rice (short grain Japanese rice)
- 3 tablespoons rice vinegar
- 2 tablespoons sugar
- 1 teaspoon salt
- 1 lb fresh salmon fillet (skinless, boneless)
- 1/2 cup Japanese mayonnaise (e.g., Kewpie)
- 2-3 tablespoons sriracha chili sauce (adjust to your spice love)
- 2 tablespoons soy sauce or eel sauce (for glazing)
- 3-4 green onions (scallions), finely chopped
- 2 tablespoons fish roe (tobiko or masago)
- 1 tablespoon toasted sesame seeds
- Optional: 1 tablespoon furikake seasoning (great for the rice)
- Optional: 1/2 teaspoon garlic powder or ginger powder (for the spicy mayo)
Instructions
- Rinse and Cook the Rice: Rinse your sushi rice under cold water until the water runs clear (this helps get rid of extra starch). Cook the rice using a rice cooker or stovetop according to package instructions.
- Make Sushi Vinegar: In a small bowl, stir together rice vinegar, sugar, and salt until everything dissolves.
- Season the Rice: While the rice is still warm, gently fold in the vinegar mixture. Try not to mash the rice—just a gentle folding motion. Let it cool to room temperature. If you love extra flavor, mix in some furikake seasoning now.
- Prep the Oven: Preheat your oven to 375°F (190°C).
- Mix the Spicy Mayo: In a bowl, combine Japanese mayonnaise with sriracha chili sauce. Add garlic or ginger powder if you’re using them and stir well.
- Layer the Bake: Grease an 8×8 inch baking dish. Spread the seasoned sushi rice evenly at the bottom, pressing it down firmly but gently so it stays together.
- Add Salmon: Place the salmon fillet evenly over the rice layer.
- Top with Spicy Mayo: Spread the spicy mayo mixture evenly over the salmon.
- Bake: Slide the dish into the oven and bake for 15-20 minutes. You’re looking for the salmon to be cooked through and the mayo topping to be lightly browned and bubbly.
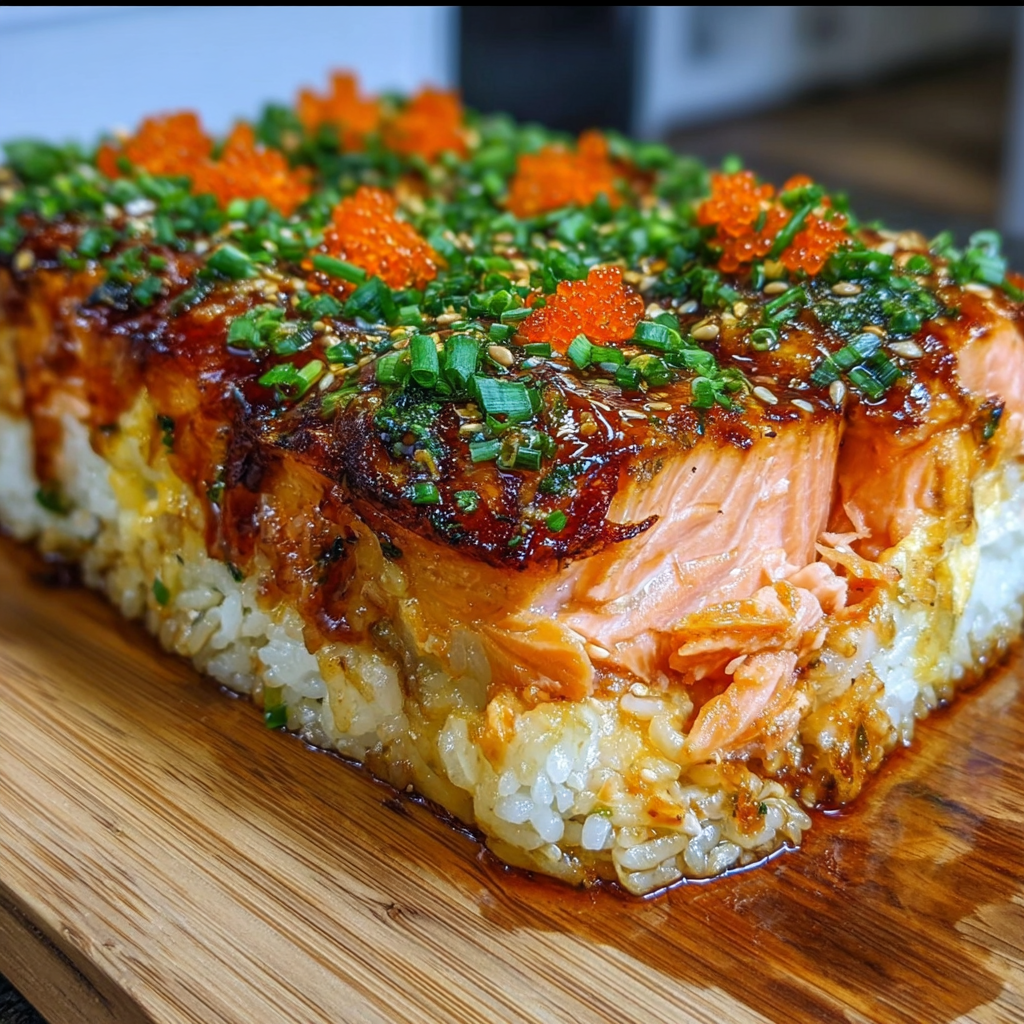
- Glaze and Garnish: Quickly brush the top with soy sauce or eel sauce for that delicious glaze and beautiful shine. Sprinkle green onions, toasted sesame seeds, and fish roe evenly over.
- Cool and Serve: Let the sushi bake cool just a few minutes before slicing into squares. Serve warm for the best taste experience.
Helpful Tips for Success
- Rice Rinse is Key: Don’t skip rinsing the sushi rice! It makes the texture perfect and prevents it from getting mushy.
- Use Fresh Salmon: Fresh, skinless fillet will give you the best flavor and texture. If you want to make it extra safe, you can briefly freeze it first to kill any parasites.
- Spicy Mayo Adjustments: Feel free to control the heat — start with less sriracha and add more if you like it hotter.
- Storage: Leftovers keep well in the fridge for up to 2 days. Reheat gently in the oven or microwave but watch the mayo topping doesn’t get too oily.
- Serving Suggestions: Pair your sushi bake with a simple cucumber salad or pickled ginger for freshness.
Equipment You’ll Need
- Rice cooker or a pot with a tight-fitting lid
- Mixing bowls for vinegar dressing and spicy mayo
- An 8×8 inch baking dish (or similar size)
- A spatula for spreading
- A brush for glazing sauce
- Measuring cups and spoons
- Sharp knife for slicing
Frequently Asked Questions
- Can I use other fish besides salmon? Yes! Tuna or even cooked shrimp are great alternatives.
- Is it possible to make this vegan? Absolutely. Just swap salmon with marinated tofu or tempeh, and use vegan mayo instead.
- Can I prepare the rice the day before? You can, but make sure to store it in the fridge and bring it back to room temperature before assembling.
- What if I don’t have Japanese mayo? Regular mayo works in a pinch, but Kewpie has a unique sweetness that makes it extra yummy.
- How spicy is this dish? You control that! Start with less sriracha and add more if you want a bigger kick.
Let’s Make It Together!
I really hope you give this salmon sushi bake a try—it’s one of those recipes that feels fancy but is actually simple. When you make it, don’t forget to share your photos and tweaks on Pinterest or leave me a comment! I love seeing how everyone makes this dish their own, and I’m here if you have any questions along the way. Happy baking and sushi loving!
