
Welcome to Cookie Monster Bliss!
Hey there, cookie lovers! Today is all about one of my all-time favorite treats—Cookie Monster cookies! If you’re like me, you love a good, soft, and chewy cookie. Seriously, with these bright blue beauties, you’re not just baking cookies; you’re baking fun! These cookies will bring a smile to anyone who sees (or eats) them, and they’re super easy to make. Plus, who wouldn’t want to take a bite out of a Cookie Monster?
Nutritional Benefits of Your Cookie Adventure
Now, I know what you might be thinking: “Cookies can’t be healthy!” Well, while these are definitely a sugary treat, homemade cookies do allow you some control. You can choose to use less sugar than store-bought versions, or swap in whole grain flour if you want that extra fiber! Plus, with the excitement of Oreos mixed in, you’re indulging in a fun treat that brings joy to any gathering.
Fun Variations to Make Your Cookies Unique
- Cookie Swaps: Want to try a different flavor? You can swap out the Oreos for other types of sandwich cookies. Think mint, peanut butter, or even vanilla!
- Colorful Cookie Variants: Feel free to get creative with colors! I’ve seen folks use pink, green, or even yellow food coloring for a festive twist.
- Vegan Option: If you’re looking for a dairy-free version, replace the butter with a plant-based butter and the eggs with a flaxseed or chia seed egg substitute—simple and yummy!
Let’s Get Baking: Cookie Monster Cookies Recipe
Ingredients
- 2 ¼ cups all-purpose flour
- 1 teaspoon baking soda
- ½ teaspoon salt
- 1 cup unsalted butter, softened
- ¾ cup granulated sugar
- ¾ cup packed brown sugar
- 2 large eggs
- 2 teaspoons vanilla extract
- Blue food coloring (gel or liquid), about 1 to 1 ½ teaspoons
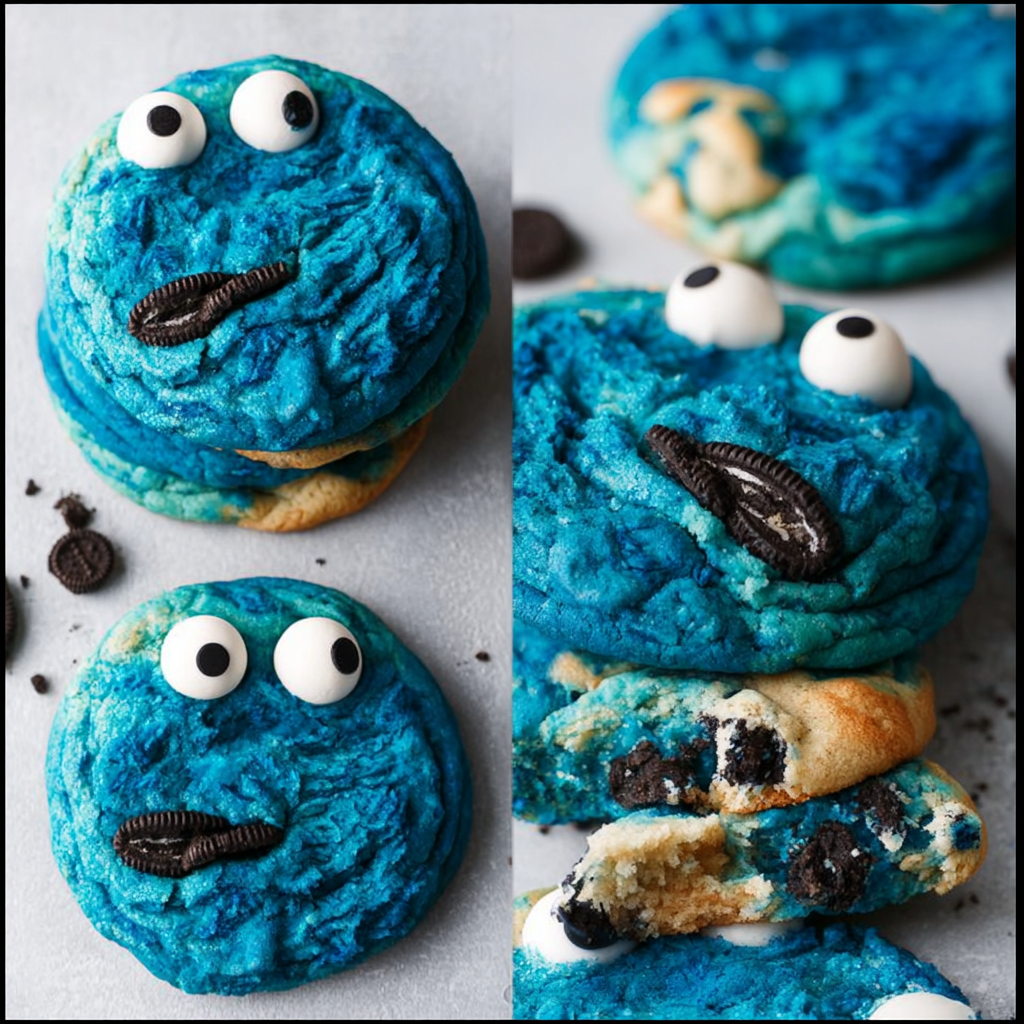
- 10-12 Oreo cookies, chopped (for batter)
- Additional small Oreo pieces (for mouths)
- Candy eyeballs (edible decoration), 2 per cookie
Serves 18–24 people
- About 18–24 cookies, assuming 1 cookie per person.
Instructions
- Preheat your oven to 350°F (175°C) and line your baking sheets with parchment paper or silicone mats.
- In a medium bowl, whisk together the flour, baking soda, and salt. Set that aside for now—we’ll come back to it.
- In a large bowl, grab your mixer and cream together the softened butter, granulated sugar, and brown sugar until it’s light and fluffy (about 3-4 minutes). This step is crucial for that nice texture!
- Beat in the eggs one at a time, and then mix in the vanilla extract until everything is well combined.
- Gradually add the dry ingredients to your wet mixture, mixing on low speed until everything is just combined. No overmixing here!
- Now comes the fun part! Stir in the blue food coloring a little at a time until you reach your desired vibrant blue. It’s like a little magic!
- Gently fold in the chopped Oreos. Be careful not to crush them too much—you want those delightful pieces in your cookies!
- Scoop the dough onto your prepared baking sheets, spacing them about 2 inches apart, and slightly flatten each mound.
- Press two candy eyeballs onto the top of each cookie, and add a small piece of Oreo cookie near the eyes to resemble a mouth. It’s so cute!
- Bake for 10-12 minutes or until the edges are lightly golden but the centers are still soft. Remember, they’ll look a bit underbaked—trust the process!
- Let them cool on the baking sheet for 5 minutes before transferring to a wire rack to cool completely. And then… enjoy!
Practical Tips for Perfect Cookies
- If your dough feels too sticky, you can chill it in the fridge for about 30 minutes. This makes scooping easier!
- Store leftover cookies in an airtight container for up to a week, though I doubt they’ll last that long!
- For an extra special treat, try drizzling melted white chocolate or adding colorful sprinkles on top after baking!
Equipment You’ll Need
Here’s a handy list of what you’ll want to have ready before starting your fun cookie adventure:
- A mixing bowl
- A whisk
- A mixer (hand or stand)
- Baking sheets
- Parchment paper or silicone baking mats
- A cookie scoop or spoon
- A wire rack for cooling
Frequently Asked Questions
- Can I use margarine instead of butter? Yes, you can, but it might slightly change the flavor and texture.
- What if I can’t find blue food coloring? No problem! You can use a mix of other colors, or leave it as a classic cookie.
- Can I freeze the cookie dough? Absolutely! Just scoop it onto a baking sheet, freeze until firm, then transfer to a zip-top bag. Bake from frozen when you’re ready!
- How many cookies does this recipe make? This recipe usually yields about 24 cookies, depending on how big you scoop them.
- What’s the best way to handle the sticky dough? Slightly dampening your hands or using a cookie scoop can help make it less sticky!
Join the Cookie Monster Fun!
So there you have it—your very own Cookie Monster cookies, ready to delight friends and family! I want to know how yours turned out, so don’t forget to share your cookie photos on Pinterest or tag me if you try this recipe. Let’s spread some cookie joy together!
