
Your Go-To Melt-in-Your-Mouth Cake
Hey there! If you’re searching for a cake that’s as light and fluffy as it is delicious, then you’ve hit the jackpot. This Melt-in-Your-Mouth Cake is one of my all-time favorites. I mean, who doesn’t enjoy a slice of cake that feels like a hug for your taste buds? It’s perfect for celebrations or simply when you feel like indulging. Plus, it’s surprisingly easy to whip up! Let’s dive into why you’ll love this cake as much as I do.
Nutritional Benefits
Now, I know cake isn’t usually labeled as “healthy,” but let me share a little secret. This cake can be enjoyed in moderation, and does bring a few benefits! For starters, you can use whole milk, which provides calcium and essential vitamins. If you sprinkle in some fresh strawberries, you’ll get a boost of vitamin C and antioxidants. Plus, whipping your own cream means you have control over what’s going in it—no preservatives here!
Adaptable Variations
- Gluten-Free Option: Swap out the all-purpose flour for a 1:1 gluten-free flour blend. This way, you can enjoy the same deliciousness without the gluten.
- Sweetener Swap: If you’re looking to cut down on sugar, try substituting granulated sugar with coconut sugar or a sugar substitute of your choice.
- Flavor Fun: Want to try different flavors? Mix in some lemon zest or almond extract instead of vanilla for a unique twist!
- Dairy-Free Version: Use coconut cream in place of heavy whipping cream and almond milk instead of whole milk to create a delightful dairy-free dessert!
The Ultimate Melt-in-Your-Mouth Cake Recipe
Ingredients
- 2 cups all-purpose flour
- 1 ½ cups granulated sugar
- ½ cup unsalted butter (softened)
- 1 cup whole milk
- 3 large eggs
- 1 tablespoon baking powder
- 1 teaspoon vanilla extract
- ½ teaspoon salt
- 1 ½ cups heavy whipping cream
- 2 tablespoons powdered sugar (for whipping cream)
- Fresh strawberries (for garnish)
- Strawberry jam (for filling and drizzle)
- Powdered sugar (for dusting)
Serves 8–10 people
Standard portions → 8 servings
Slightly smaller portions → up to 10 servings
Step-by-Step Instructions
- Preheat your oven to 350°F (175°C). Grab two 9-inch round cake pans and grease and flour them well—that way, your cakes won’t stick.
- In a large mixing bowl, cream together the softened butter and granulated sugar. You’ll want this mixture to be light and fluffy, so mix it for about 3-5 minutes!
- Add the eggs one at a time, mixing well after each one. Then throw in the vanilla extract—this is where the magic starts!
- In another bowl, sift together the all-purpose flour, baking powder, and salt. This step helps to make your cake even fluffier.
- Now for the fun part! Gradually add the dry ingredients into the wet mixture, alternating with the whole milk. Start and end with the flour mix. Gentle mixing is key here; you don’t want to overmix. The batter should be just combined.
- Divide the batter evenly between the two prepared cake pans and smooth the tops. Don’t worry about perfection; it’ll come together!
- Pop those pans in the preheated oven and bake them for 25-30 minutes. You’ll know they’re ready when a toothpick inserted into the center comes out clean!
- Once baked, it’s time to remove them from the oven. Let them cool in the pans for about 10 minutes. Then carefully turn the cakes out onto a cooling rack to cool completely.
- While they cool, grab a chilled mixing bowl and whip up your heavy cream with powdered sugar until soft peaks form. This will be your luscious topping!
- With the cakes cool, place one layer on a serving plate. Spread a layer of strawberry jam across the top. The sweetness will balance the richness of the cake!
- Then, add a generous layer of whipped cream on top of that. You seriously cannot have too much cream!
- Top with the second cake layer, and then get playful with the decoration by adding more whipped cream on top. You can create swirls or peaks—whatever makes you happy!
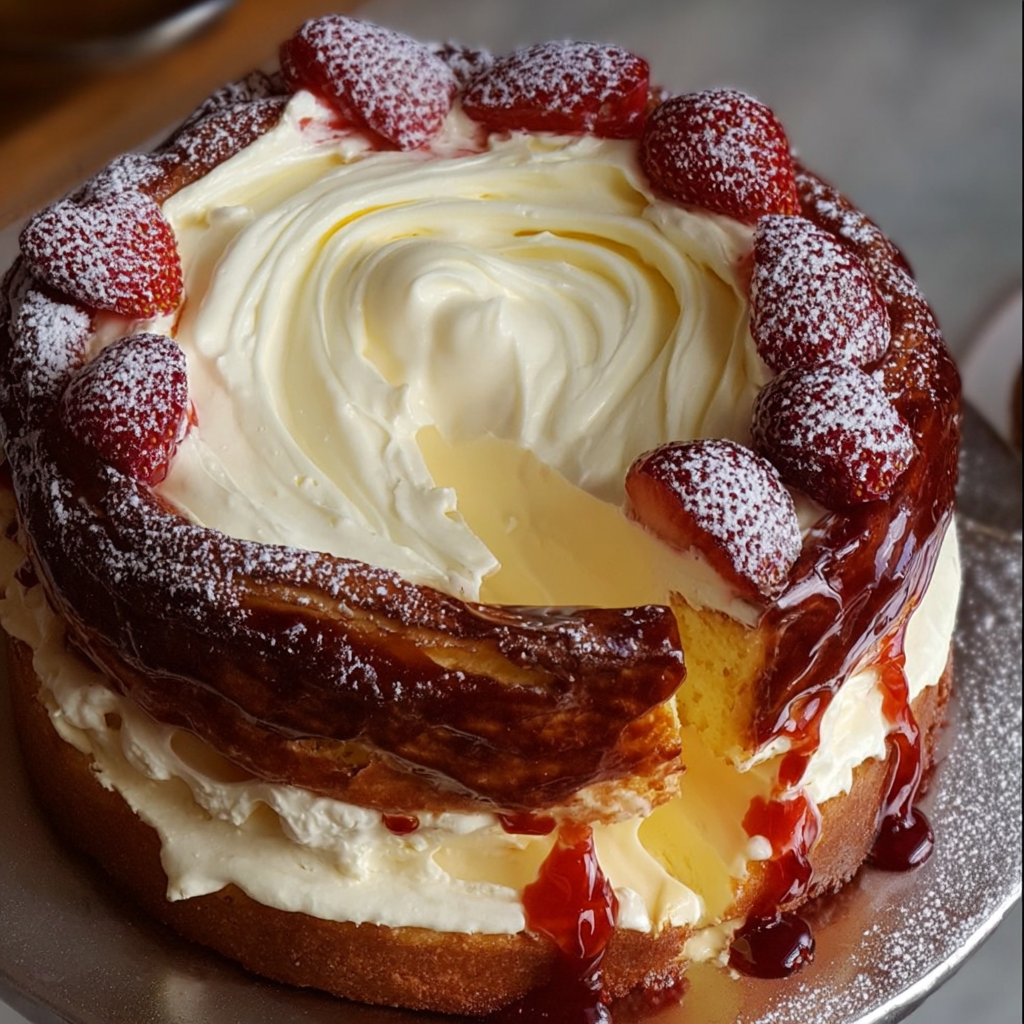
- Don’t forget to finish with fresh strawberries around the edges, a drizzle of strawberry jam, and a light dusting of powdered sugar for a beautiful touch.
- Slice into this beauty and serve immediately. Trust me; you won’t regret it—every bite is pure bliss!
Practical Tips
- For ultra-fluffy cakes, make sure your butter is softened properly—like, really softened. Leave it out at room temperature for about an hour before you start.
- Room temperature eggs mix more easily, helping to incorporate air into your batter, which means a fluffier cake!
- If you want to prepare ahead, you can make the cakes a day in advance—just wrap them well in plastic wrap to keep them fresh.
- You can store any leftover cake in an airtight container at room temperature for a couple of days, but we all know it probably won’t last that long!
- If you’re planning to freeze it, slice it up first, and then wrap the slices tightly! They can last in the freezer for up to three months.
Equipment Needed
Here’s what you’ll need for this baking adventure:
- Two 9-inch round cake pans (make sure to grease and flour them),
- A large mixing bowl for whipping up the batter,
- A measuring cup and spoons for precision,
- A hand mixer or stand mixer (but a whisk works too if you’re feeling up for a workout!),
- A cooling rack for cooling your cakes,
- A spatula for smoothing the frosting,
- A sharp knife for slicing (always the best part!).
Frequently Asked Questions
- Can I use a different type of milk? Absolutely! Almond milk or soy milk can be great alternatives for a dairy-free version.
- How do I know when my cake is done? Use a toothpick inserted in the center. If it comes out clean or with a few crumbs, it’s ready!
- Can I use frozen strawberries? Yes! Just ensure they’re thawed and drained, so you don’t add extra moisture.
- How can I make this cake ahead of time? You can bake the cakes a day or two ahead and frost them right before serving to keep it fresh!
- Can I replace the whipped cream with something else? Of course! You can use store-bought whipped topping or even cream cheese frosting for a different flavor!
Let’s Connect!
I truly can’t wait for you to try this Melt-in-Your-Mouth Cake! When you do, please let me know how it turns out. Snap a picture and tag me over on Pinterest; I’d love to see your delicious creations and share them with my friends! Happy baking!
