
Hey there! If you’re anything like me, there’s nothing more comforting than a delicious bowl of macaroni and cheese. It’s one of those classic dishes that just brings back warm memories of home cooked meals, right? I love making baked mac and cheese because it’s not only super creamy and cheesy but also gives that lovely golden crust on top! This recipe is a guaranteed crowd-pleaser, and I promise it’ll make your taste buds dance with joy!
Nutritional Benefits of Homemade Mac and Cheese
You might think of baked mac and cheese as a guilty pleasure, but let’s chat about some of its nutritional benefits! First off, mac and cheese gives you a good dose of carbs from the pasta, which helps fuel your body. Cheese, while delicious, also brings in a nice source of calcium and protein. Plus, since you’re making it at home, you have total control over the ingredients! You can even sneak in some veggies like steamed broccoli or spinach to boost the nutritional content without sacrificing taste.
Fun Variations to Make
- Veggie Lovers Delight: Add some steamed broccoli, peas, or sautéed mushrooms before baking for an extra nutritious twist!
- Meaty Mac: Throw in cooked bacon or diced ham for a smoky flavor that will take it to the next level!
- Spicy Kick: Add a dash of cayenne pepper or diced jalapeños if you enjoy a bit of heat in your dish.
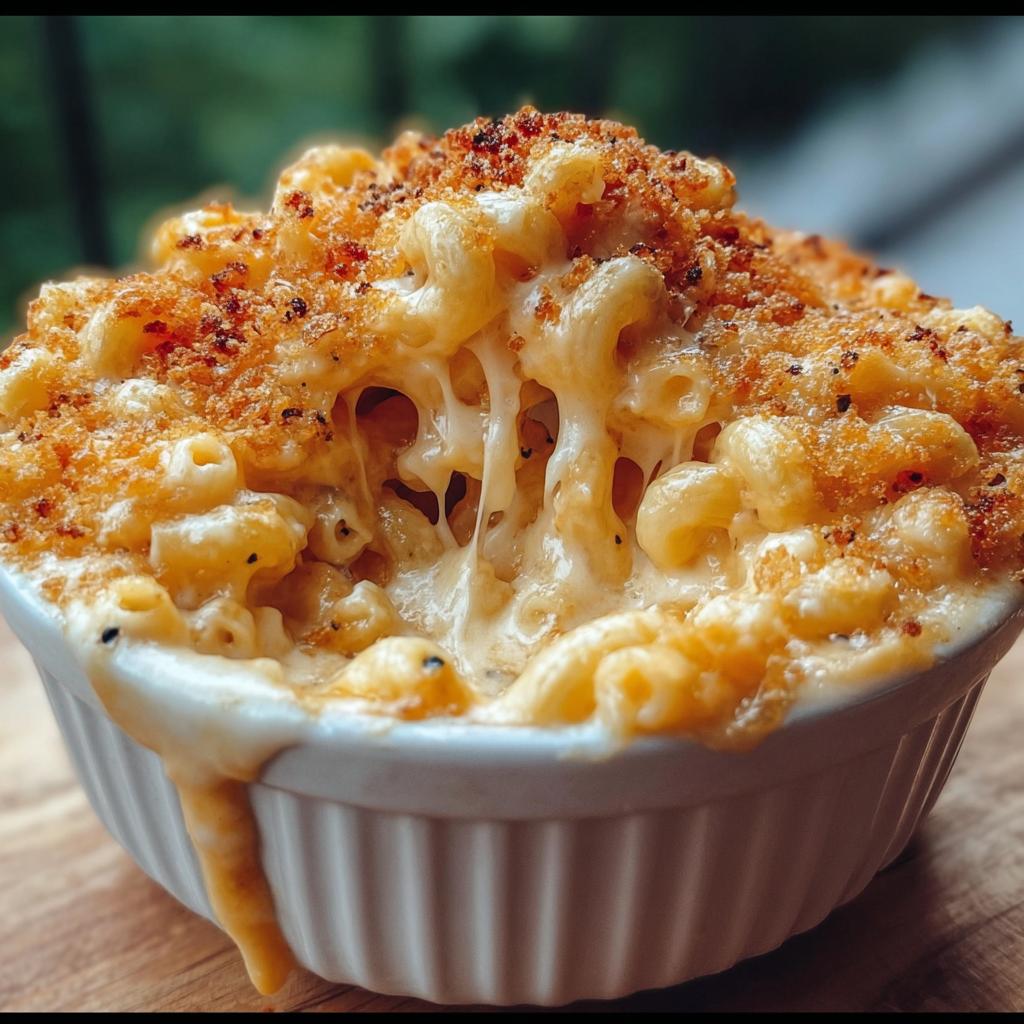
Easy Gourmet Baked Mac and Cheese Recipe
Ingredients
- 2 cups elbow macaroni pasta
- 3 tablespoons unsalted butter (for sauce)
- 3 tablespoons all-purpose flour
- 2 ½ cups whole milk (or half milk, half heavy cream for extra creaminess)
- 1 cup sharp yellow cheddar cheese, shredded
- 1 cup mozzarella cheese, shredded
- ½ cup Gruyère or Parmesan cheese, shredded (optional but recommended for gourmet flavor)
- 1 cup plain breadcrumbs (preferably panko for extra crunch)
- 2 tablespoons unsalted butter (melted, for breadcrumb topping)
- 1 teaspoon Dijon mustard (optional, for taste depth)
- ½ teaspoon garlic powder (optional)
- Salt and freshly ground black pepper, to taste
Instructions
- Preheat your oven to 350°F (175°C). This way, it’ll be just the right temperature to get that crispy topping!
- Boil a large pot of salted water, then add the elbow macaroni. Cook until al dente for about 7-8 minutes, then drain and set aside.
- In a medium saucepan, melt 3 tablespoons of butter over medium heat. Stir in the flour to create a roux and cook for about 1-2 minutes until it turns light golden, stirring constantly.
- Gradually whisk in the milk (and/or cream), making sure to get rid of any lumps in the mixture. Cook while stirring until it thickens and coats the back of a spoon—this should take about 5-7 minutes.
- Lower the heat, then stir in the shredded cheddar, mozzarella, and Gruyère (if using), along with the mustard, garlic powder, salt, and pepper. Keep stirring until the cheese melts completely and the sauce becomes smooth and creamy. Adjust the seasoning to your taste.
- Gently fold the drained macaroni into the cheese sauce until everything is well combined.
- Transfer this cheesy goodness to an oven-safe baking dish or individual ramekins.
- In a small bowl, combine the plain breadcrumbs with the 2 tablespoons of melted butter. Mix until the breadcrumbs are evenly coated, then sprinkle them on top of your mac and cheese mixture.
- Bake uncovered for 20-25 minutes, until the topping turns golden brown and crispy, and the sauce is bubbly. If you want that extra crunch, you can broil for 1-2 minutes at the end, but keep your eyes on it so it doesn’t burn!
- Once out of the oven, allow it to rest for about 5 minutes before serving to help the sauce thicken a bit.
- Serve hot and dig into this rich, creamy, and crunchy gourmet baked mac and cheese!
Practical & Valuable Tips
- Have leftover mac and cheese? Store it in an airtight container in the fridge for up to 3 days and just reheat in the oven or microwave before serving.
- Feel free to substitute half of the milk with chicken or vegetable broth for a lighter version—or to enhance the flavor.
- If you don’t have all three cheeses, just stick to your favorites! Mozzarella and cheddar alone can still yield a delicious dish.
Equipment Needed
Here’s what you’ll need to whip up this delightful dish:
- A large pot for boiling pasta
- A medium saucepan for the cheese sauce
- A whisk for mixing the sauce
- A baking dish or individual ramekins for baking
- A small bowl for mixing the breadcrumb topping
- Measuring cups and spoons for accuracy
Frequently Asked Questions
- Can I use gluten-free pasta? Absolutely! Substitute the elbow macaroni with any gluten-free pasta of your choice.
- How can I make this mac and cheese vegetarian? Just avoid any meat toppings and ensure your cheeses are vegetarian-friendly!
- What’s the best way to reheat leftover mac and cheese? The oven is best! Just sprinkle a little bit of milk on top before baking so it doesn’t dry out.
- Can I make mac and cheese ahead of time? Yes! Prepare everything but the baking step, keep it covered in the fridge, and bake it when you’re ready to serve.
- Can I freeze mac and cheese? Definitely! Just ensure it’s in a freezer-safe container. It’ll last about 3 months. Thaw overnight in the fridge before reheating.
Did you give this baked mac and cheese a try? I’d love to know how it turned out for you! Don’t forget to follow me on Pinterest for more delicious and easy recipes that can brighten your dining table!
