
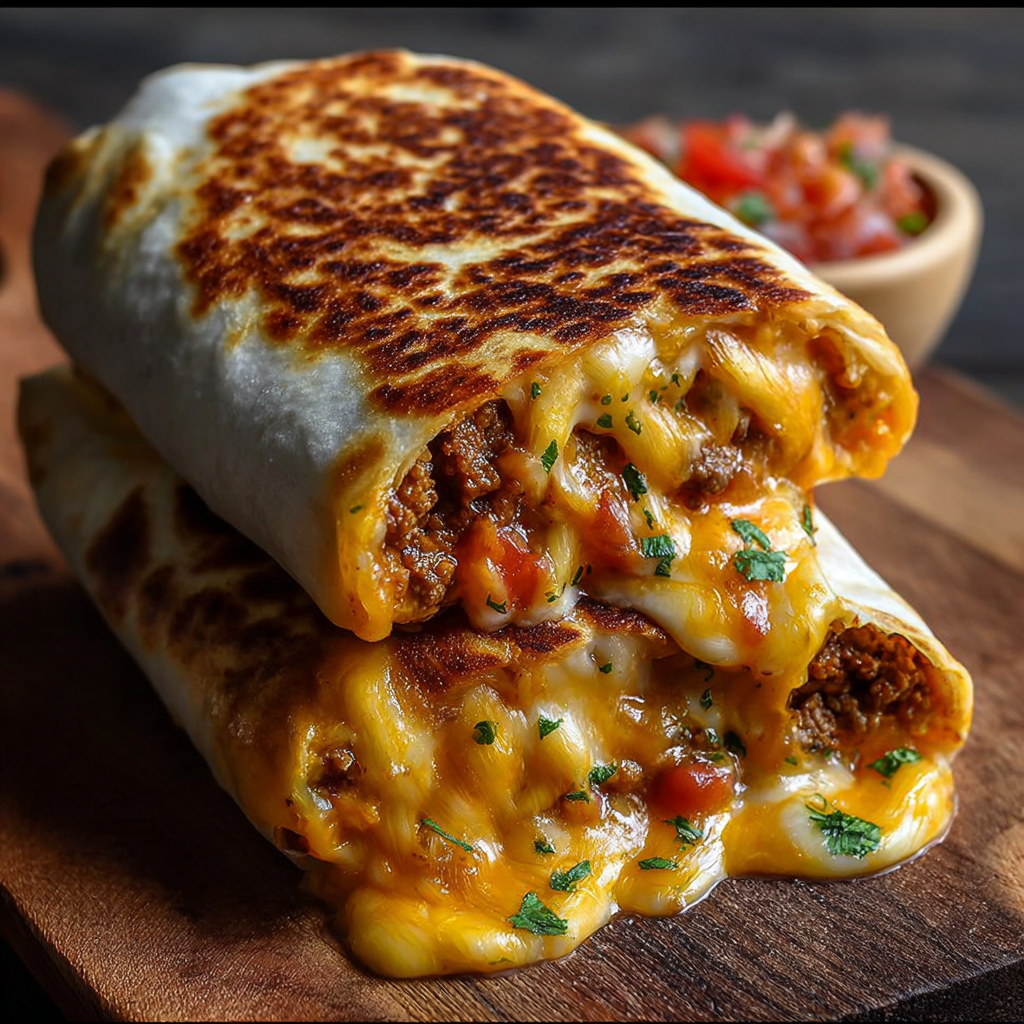
Hey There! Let’s Make Delicious Crispy Cheese and Beef Burritos Together
If you’re searching for a comforting, filling meal that’s bursting with flavor and a little bit crispy on the outside—then you’re going to love these cheese and beef burritos! I’ve made them so many times, and honestly, they never fail to bring smiles to the table. The mix of melty cheddar and mozzarella cheese, seasoned ground beef, and sautéed bell peppers wrapped in a perfectly grilled tortilla is such a treat.
Plus, they’re pretty simple to whip up, even on a busy weeknight. I can’t wait to share this recipe with you, along with some helpful tips and ideas to make it your own!
Nutritional Benefits of This Burrito
One thing I like about this burrito recipe is that it balances protein, dairy, and veggies in a tasty way. The ground beef provides a great source of protein and iron, which is essential for energy and muscle health. The cheeses offer calcium for strong bones and add that irresistible creamy texture. Don’t forget the bell peppers — they’re jam-packed with vitamins like C and A, plus fiber to support digestion.
While it’s an indulgent dish, you can feel good about the nourishing ingredients inside. You get a nice mix of nutrients wrapped up in every bite!
Delicious Ways to Make It Your Own
- Go Veggie-Friendly: Swap out the ground beef for cooked black beans or lentils for a protein-packed vegetarian version.
- Spice It Up: Add a dash of cayenne pepper or some chopped jalapeños into the beef mix if you love a little extra kick.
- Cheese Swap: Use pepper jack cheese for a spicy twist or add a sprinkle of feta cheese after cooking for a tangy punch.
- Make It Gluten-Free: Use gluten-free tortillas to fit any dietary needs.
- Extra Veggies: Toss in some corn kernels, diced tomatoes, or sliced olives with the bell peppers to boost flavor and color.
Your Step-by-Step Guide to Perfect Crispy Cheese and Beef Burritos
What You’ll Need
- 4 large flour tortillas
- 1 lb ground beef
- 1 cup shredded cheddar cheese
- 1 cup shredded mozzarella or Monterey Jack cheese
- ½ cup diced bell peppers (red or mixed colors)
- 1 teaspoon chili powder
- 1 teaspoon ground cumin
- ½ teaspoon paprika
- ½ teaspoon garlic powder
- Salt and pepper, to taste
- 1 tablespoon oil or butter (for cooking and grilling)
- Fresh cilantro or parsley, chopped (for garnish)
- Sour cream or ranch dressing (for dipping)
Let’s Cook!
- Heat 1 tablespoon of oil or butter in a skillet over medium heat. Toss in the diced bell peppers and sauté for about 2-3 minutes, just until they start to soften.
- Add the ground beef to the skillet and cook it up, breaking it apart with your spoon, until there’s no pink left and it’s fully browned—usually takes 6-8 minutes.
- Sprinkle in the chili powder, ground cumin, paprika, garlic powder, plus salt and pepper to taste. Stir everything well and let those rich flavors mix for another 2 minutes. Then, take it off the heat.
- Lay out a tortilla flat on your clean surface. Spread a layer of shredded cheddar and mozzarella cheese right in the center.
- Spoon a generous amount of your tasty beef mixture over the cheese. Add a little more cheese on top of the beef for an extra melt factor.
- Fold in the sides of the tortilla tightly over the filling, then roll it up like a burrito, keeping everything snug.
- Heat a clean skillet or grill pan on medium heat and add a small bit of oil or butter. Place the burrito seam-side down to seal it.
- Grill it for 3-4 minutes on each side, pressing gently with a spatula, until the tortilla turns a beautiful golden brown with appetizing grill marks and the cheese inside is all gooey and melted.
- Take it off the heat, let it rest for just a minute, then slice the burrito in half.
- Sprinkle with chopped cilantro or parsley for a fresh touch and serve with sour cream or ranch dressing on the side for dipping. Enjoy!
Helpful Tips for the Best Burritos
- Use a non-stick skillet or a well-oiled pan to get that perfect crisp without sticking.
- If you like your peppers more tender, sauté a little longer before adding the beef.
- Don’t overfill your burrito — it’s easier to roll and less likely to burst open while cooking.
- If you want to keep them warm for a crowd, pop them into a low oven (about 200°F / 95°C) on a baking sheet while you finish grilling the rest.
- Leftovers taste amazing cold the next day or reheated in a skillet to re-crisp the tortilla.
Equipment You’ll Find Handy
- Large skillet or frying pan
- Spatula for stirring and pressing burritos
- Cutting board and knife for dicing bell peppers and chopping herbs
- Cheese grater (if you’re shredding your own cheese)
- Plate or clean surface for assembling burritos
- Optional: Grill pan if you want grill marks on your burritos
Frequently Asked Questions
- Can I use ground turkey or chicken instead of beef? Absolutely! Ground turkey or chicken works well and will give you a lighter option.
- Can I prepare the beef mixture ahead of time? Yes, you can cook the beef and peppers a day ahead, store it in the fridge, and assemble the burritos when ready to save time.
- How spicy is this recipe? Can I adjust it? It’s mildly spicy—you can control the heat by adjusting chili powder amount or adding fresh jalapeños if you want more kick.
- What’s the best way to store leftover burritos? Wrap them tightly in foil or plastic wrap and refrigerate for up to 3 days. Reheat in a skillet or oven for crispiness.
- Can I freeze these burritos? Yes! Wrap individually and freeze for up to 2 months. Reheat in the oven or air fryer straight from frozen.
Give It a Try and Share Your Experience!
I’d love to hear how your burritos turned out! Did you try one of the variations or add your own twist? Don’t be shy—pin this recipe on Pinterest, share your photos or questions, and let’s keep the delicious conversation going. Happy cooking and even happier eating!
