
Welcome to My Favorite Thai-Inspired Peanut Chicken Bowl!
Hi there! If you love tasty dishes that bring a little bit of sunshine to your plate, you’re going to enjoy this Thai Peanut Chicken Bowl. I personally love how fresh, creamy, and zesty it is all at once. Plus, it’s super simple to make, which is perfect for busy days when you want something delicious without spending hours in the kitchen. The rich peanut sauce and tender chicken make it feel like a special meal, but you can whip it up any night of the week!
Nutritional Benefits of This Dish
This recipe is not only bursting with flavor but also provides a nice balance of nutrients. The chicken gives you a good punch of protein, helping keep your energy steady throughout the day. The jasmine rice adds a gentle, comforting carb boost, while the fresh veggies like cucumber and carrots add fiber and vitamins, making this bowl both filling and wholesome.
Also, the peanut butter brings healthy fats and a bit of creamy richness without overwhelming the dish. Using fresh lime juice and herbs like cilantro gives it a refreshing twist and adds antioxidants, boosting your immune system.
Fun Twists and Variations You Can Try
- Vegetarian Version: Swap the chicken for firm tofu or tempeh. Marinate and grill them just like the chicken for that same delicious flavor.
- Spice It Up: If you like it spicy, add more chili paste or toss in some sliced fresh red birds-eye chilies on top for an authentic heat kick.
- Rice Alternatives: Try using brown rice or even cauliflower rice to make it lighter or add more fiber.
- Crunch Factor: Besides crushed peanuts, try adding toasted sesame seeds or even roasted cashews for a fun crunch.
- Make It Creamier: For a richer peanut sauce, stir in a spoonful of coconut cream or Greek yogurt right before serving.
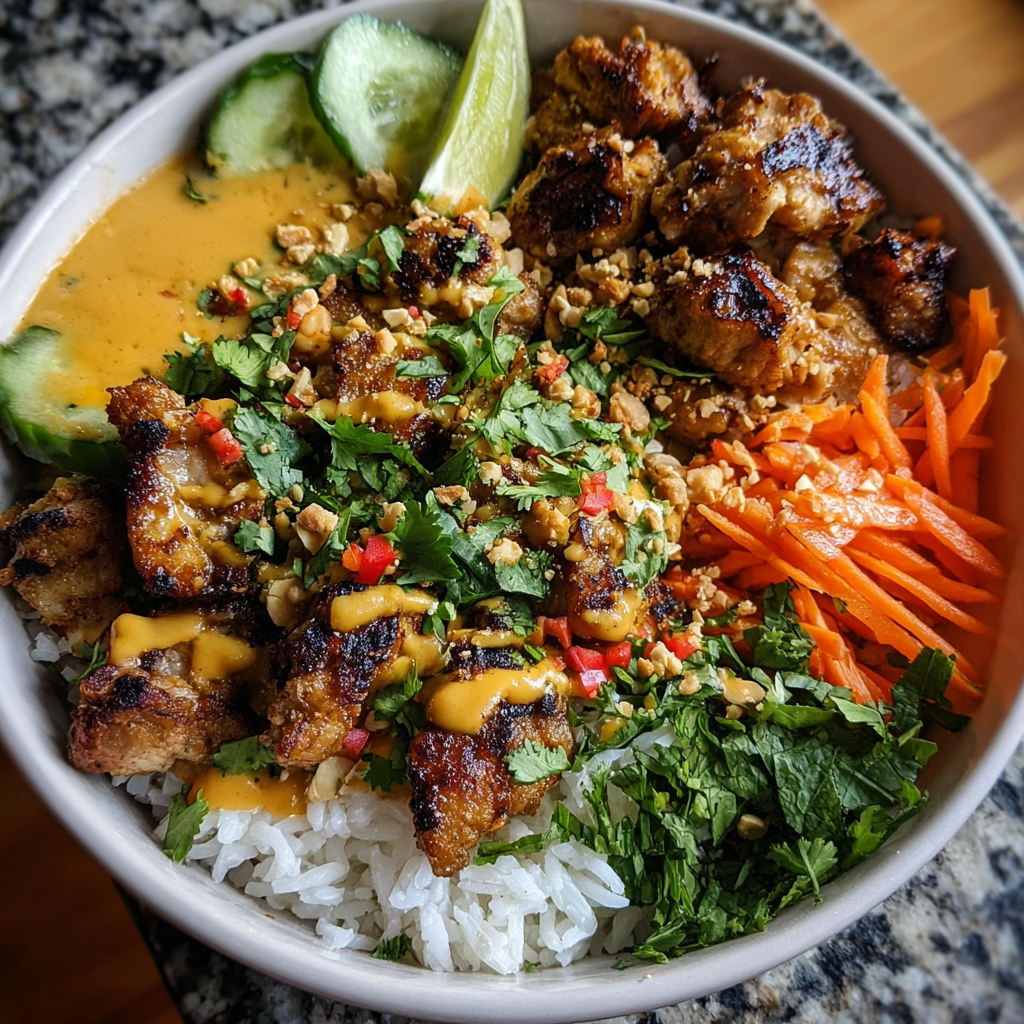
Step-by-Step Thai Peanut Chicken Bowl Recipe
Ingredients
- 1 lb boneless chicken thighs or breasts, cut into bite-sized pieces
- 1 cup jasmine or long-grain white rice
- 1/2 cup coconut milk (for marinade)
- 2 tbsp soy sauce or fish sauce (for marinade and sauce)
- 2 cloves garlic, minced
- 1 tsp grated fresh ginger
- 1 tsp turmeric powder
- 1 tbsp brown sugar or palm sugar
- 1/3 cup peanut butter (smooth or crunchy)
- 1-2 tbsp lime juice (freshly squeezed)
- 1 tsp chili paste or fresh chopped red chili (adjust to taste)
- 1/4 cup shredded carrots
- 4-5 cucumber slices
- 1/4 cup chopped fresh cilantro (coriander leaves)
- 2 tbsp crushed roasted peanuts
- 1-2 tbsp vegetable or peanut oil (for cooking)
- Lime wedges for garnish
- Salt and pepper to taste
- Water as needed to thin peanut sauce
Instructions
- Start by rinsing your rice under cold water until it runs clear. Then cook it following the package instructions or by simmering with 1.5 cups of water until nice and fluffy.
- While that’s going, mix the coconut milk, soy or fish sauce, minced garlic, fresh ginger, turmeric, and brown sugar in a bowl. Toss in the chicken pieces, making sure every bit gets coated. Let it marinate for at least 30 minutes. If you have time, a couple of hours in the fridge makes it even better.
- Next up, whip up the peanut sauce! Combine peanut butter, about 1/4 cup coconut milk, lime juice, soy or fish sauce, a bit of garlic if you like, chili paste, and some brown sugar. Add water little by little until it’s silky and pourable. Taste and adjust—it should be sweet, tangy, spicy, and salty all at once.
- Heat your oil in a grill pan or skillet over medium-high heat. Shake the excess marinade off the chicken and cook it in batches. It usually takes about 4-5 minutes per side for lovely charring and fully cooked chicken.
- Prep your veggies while the chicken cooks: slice the cucumbers, shred the carrots, chop cilantro, and crush the peanuts.
- To put everything together: spoon rice into a bowl, lay the grilled chicken on one side, add the shredded carrots and cucumber slices in separate sections. Drizzle a generous amount of that tasty peanut sauce on top.
- Finish with a sprinkle of cilantro, crushed peanuts, and some chopped chili for a bit of color and heat. Don’t forget the lime wedge on the side! Squeeze it over just before eating for a fresh burst of brightness.
Helpful Tips to Make Your Cooking Even Easier
- Marinate longer: If you can, let your chicken soak in the marinade for a few hours or even overnight for deeper flavor.
- Cooking chicken in batches: Avoid crowding the pan so the chicken doesn’t steam; you want that nice charred edge.
- Make ahead: You can prepare the peanut sauce the day before and keep it chilled. It tastes even better once the flavors meld overnight.
- Storing leftovers: Keep extra peanut sauce and chicken separate from the rice to avoid sogginess when refrigerating. Stored properly, the components last 2-3 days in the fridge.
- Reheating: Heat the chicken gently in a skillet or microwave and serve with fresh veggies and sauce for the best texture.
Equipment You’ll Need
- Medium pot for cooking rice
- Bowl for marinating the chicken
- Whisk or fork to mix the peanut sauce
- Grill pan or skillet for cooking chicken
- Knife and cutting board for veggies
- Spoons and bowls for serving
Frequently Asked Questions
- Can I use chicken breasts instead of thighs? Yes! Both work. Thighs are juicier and have more flavor, but breasts are leaner and cook a bit faster.
- What if I don’t have fish sauce? Soy sauce is a great substitute. Just keep an eye on the saltiness when tasting your sauce.
- Is this recipe spicy? It depends on how much chili you add. Adjust the chili paste or fresh chilies to your preferred heat level.
- Can I make this gluten-free? Yes! Just use tamari or gluten-free soy sauce, and double-check your chili paste ingredients.
- How do I store leftovers? Keep chicken, rice, and sauce in separate airtight containers in the fridge. It’ll keep fresh for about 2-3 days.
Give This Recipe a Try and Share Your Experience!
I hope you’ll have as much fun making this Peanut Chicken Bowl as I do. It’s a great way to bring bold, fresh flavors into your meal without too much fuss. If you make it, please pin it on Pinterest or share your photos and tips with me—I’d love to see how you make this dish your own!
