
My Go-To Simple Pizza Dough Recipe You’ll Love
Hey there! If you’ve ever wanted to make your own pizza from scratch but felt a bit intimidated by dough-making, I totally get it — that was me not long ago! But this simple pizza dough recipe is honestly a game-changer. It’s pretty straightforward, uses basic ingredients, and results in a crust that’s just crispy, chewy, and deliciously airy. I love how making pizza at home lets me get creative with toppings and impress my friends without ordering out.
Why Homemade Pizza Dough Is Worth It
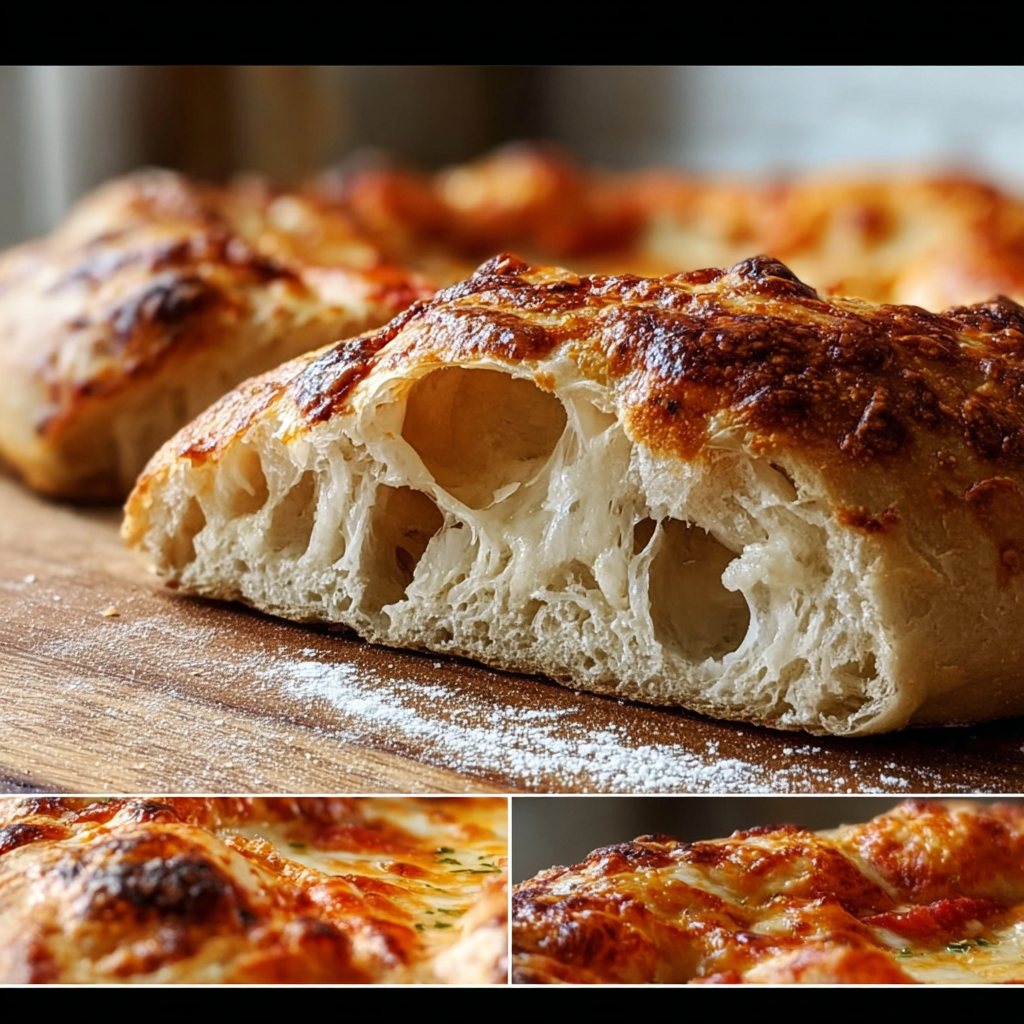
Making your own dough means you’re in control of what goes into it. No weird preservatives or mystery ingredients. Plus, freshly baked pizza taste beats anything store-bought or frozen hands-down. The slow fermentation step actually helps develop beautiful flavor and those signature chewy bubbles I totally geek out about! Plus, it’s a fun baking project that’s super rewarding.
Healthy-ish Benefits of This Pizza Dough
This dough is pretty simple and wholesome — it mainly uses bread flour and water. Using bread flour gives it that lovely chewy texture and good gluten development. And because you control the toppings, you can load your pizza with fresh veggies, lean proteins, and healthy fats like olive oil. Plus, it’s a great way to enjoy carbs the smart way because it’s homemade with no unnecessary additives!
Simple Pizza Dough Recipe
Ingredients You’ll Need
- 4 cups (480g) bread flour
- 1 ½ cups (360ml) warm water (about 105°F / 40°C)
- 2 teaspoons instant dry yeast
- 2 teaspoons salt
- 1 tablespoon olive oil (optional, but I really like the flavor it adds)
- 1 teaspoon sugar (optional, helps yeast a bit)
Step-by-Step Instructions
- In a large bowl, mix the bread flour, instant yeast, and salt. If you want, toss in the sugar here too.
- Slowly pour in the warm water and olive oil (if using), stirring with a wooden spoon or a dough hook on a mixer until a shaggy dough forms.
- Turn the dough onto a floured surface and knead for about 8-10 minutes until it feels smooth, elastic, and a bit sticky. If you have a stand mixer, using a dough hook attachment makes this easier.
- Pop the dough into a lightly oiled bowl and cover with plastic wrap or a damp towel. Let it rest at room temp for 1 to 2 hours until it roughly doubles in size.
- After it’s risen, gently press the dough down to deflate, then perform 3-4 stretch and folds to strengthen the gluten.
- Shape the dough into a tight ball, place it in a clean bowl, cover, and refrigerate for 12 to 24 hours for slow fermentation — this step really amps up the flavor and creates those bubbles we love!
- When you’re ready to bake, take it out about an hour before to warm up to room temperature.
- Preheat your oven as hot as it can go (475–500°F / 250–260°C) and place a pizza stone or steel on the middle rack for thorough heating.
- On a lightly floured surface, gently stretch or roll the dough out to your preferred pizza shape. Be careful to keep the dough bubbles intact.
- Transfer the dough to a floured or cornmeal-dusted pizza peel or baking sheet.
- Add your favorite toppings — or simply bake it as-is for a crispy crust base.
- Slide your pizza onto the preheated stone or steel and bake for 8-12 minutes until the crust is golden, bubbly, and crispy.
- Take it out, let it cool for a few minutes, slice, and enjoy!
Handy Tips to Nail Your Pizza Dough
- If the dough feels too sticky, sprinkle on a bit more flour during kneading, but don’t overdo it — the dough should stay slightly tacky.
- Using a pizza stone or steel is a game-changer because it mimics professional ovens and gives you that nice crust crisp.
- Don’t rush the refrigeration step if you can help it — slow fermentation adds so much flavor and gives that beautiful open crumb inside.
- Keep your toppings light if you want a crispy crust since too many toppings with lots of moisture can weigh the dough down.
- If you don’t have a pizza peel, use parchment paper to transfer the pizza onto the hot stone — it slides easily and reduces mess.
Equipment You’ll Find Useful
- Large mixing bowl
- Wooden spoon or stand mixer with dough hook
- Clean kitchen towel or plastic wrap
- Pasta or dough scraper (optional but helpful)
- Floured work surface
- Pizza stone or steel
- Pizza peel or baking sheet with parchment paper or cornmeal
- Oven preheated to a high temperature
Common Questions I Get About Pizza Dough
- Can I use all-purpose flour instead of bread flour?
Yes, you can! The dough might be a little less chewy and elastic, but still tasty and workable. - What if I don’t have a pizza stone?
No worries! Just use a heavy baking sheet preheated upside-down in the oven for better heat distribution. - Can I skip the slow fridge fermentation step?
You can skip it if you’re in a hurry, but the flavor and texture won’t be as developed. The longer cold ferment really takes it to another level. - How long does the dough keep in the fridge?
The dough is best within 24-48 hours. After that, it might over-ferment and become too sour or fragile. - Can I freeze the dough?
Absolutely! Wrap it tightly in plastic wrap or a ziplock bag and freeze for up to 3 months. Thaw in the fridge overnight before using.
Join Me in Pizza Making Fun!
Ready to dive into homemade pizza dough? I promise it’s easier than it looks, and the taste? So rewarding! I’d love to see your pizza creations — be sure to pin this recipe on Pinterest and share your photos or any fun toppings you tried. Let’s keep the pizza party going!
